|
|
|||||||||||||||
|
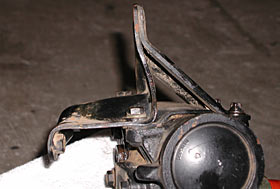
Every one of the three Jeep CJs I have owned has had one thing in common - the cheap, stamped steel steering box brackets have all been cracked from a combination of age, mileage, and abuse. The first thing I did on each one of them was replace them with new pieces, just like the marginal parts I replaced. I also did what most of us do when we run big tires - I installed a steering box brace as well. Still, I knew that the stock brackets were anything but durable and that the extra stress could eventually damage both brackets and frame.
I saw this resulting damage on a recent run. A CJ-5 was stranded on a trail with the steering box torn from the frame. Several methods were tried to temporarily tie the box to the frame, but due to the extent of the damage and the severity of the trail, they all failed. The Jeep had to be left until a group could return with an onboard welder to perform repairs. Considering the terrible weather, this wasn’t fun for anyone and it was certainly not a place I wanted to find myself if I could help it. So, what to do to avoid these problems?
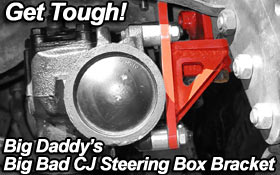
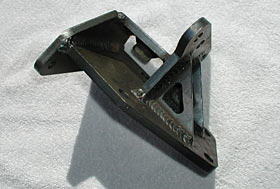
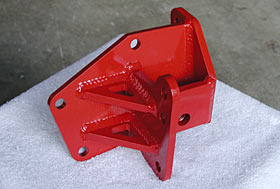
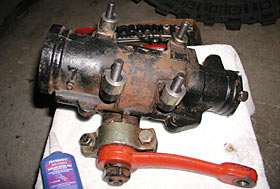
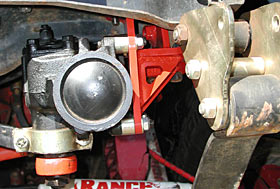
Big Daddy Offroad has the answer in their new CJ Steering Box Bracket. One look and you’ll see the difference. Big Daddy’s mount is made from 3/8” laser-cut plate steel with high-quality welds that will make any welder envious. Check out the unpainted mount and I’m sure you’ll agree! (Brackets will normally be shipped in a silver powder-coat like their new Monster Tie Rods.) These brackets are carefully assembled in a precise jig to allow simple bolting to factory holes. One extra feature can be seen if you look closely, which is the large 5/8” nut welded inside the bracket. More on that later. Let’s get on to the installation. First, remove the old gear. In most cases, this is a pretty standard procedure. In my case, this required removal of the winch mounting plate to gain access to the rear bolt in the cross member and the steering cross-brace. Other than that, just follow your service manual by disconnecting the drag link, hoses, and steering shaft. Some of you with sharp eyes will notice two things. First, I’m using a YJ gear box which bolts up directly in place of the CJ gear box with the exception of the hoses and the shaft, which uses a u-joint instead of the weaker stock CJ style. Second, the Pitman arm is bent from big tires and abuse - another testament for strong steering system components. A heavy-duty replacement is planned in the near future.
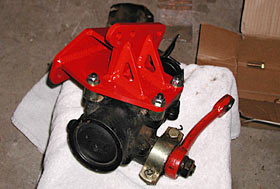
Following the instructions, install the 7/16” studs, placing the shorter 2” long one in the upper rear mounting hole and the 2 ½” ones in the other three holes, using a good thread-locking compound on each. Next, place the three .700” spacers over the 2 ½“ studs, and the .275” thick spacer over the 2” stud. Then, using the lock nuts supplied, bolt the new mount down to 65 ft. lbs., starting with the 2” stud first. Note: With all the “variances” built into Jeeps over the years, I suggest trial-fitting the new mount to your vehicle prior to bolting it to the gear. Mine required only slight filing of the rear cross member bolt hole to line up. Considering all the abuse my CJ has seen, I don’t find this unusual at all. Yours will probably line right up.
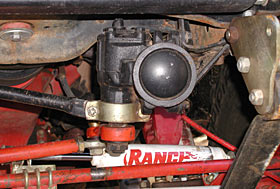
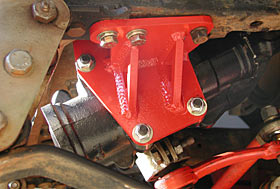
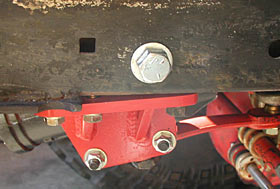
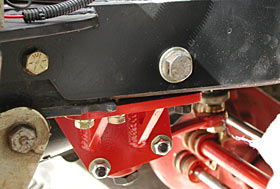
Next, bolt up the new mount to the frame. If your CJ still has the rear frame rail stud like mine, start with that first, and then allow the gear box to hang there while you get the power steering hoses started. Don’t tighten them yet. Using the new Grade 8 bolts and washers supplied, install the rest of the bolts using a small amount of thread-locker on each. When everything’s snug, torque all the bolts down to 55 ft. lbs. Now you’re done, right? Not quite! Remember that big nut welded inside the Big Daddy mount? Well, the next step is to install the supplied 5/8” x 2 ½” bolt though the existing hole in the frame and into the side of the mount. Personally, I think this is the best feature of this product. Not only is the inherent weakness of the stock brackets completely eliminated, the attachment through the frame with this additional bolt significantly increases the clamping force in this area. As you can see in the photo, I went a step further when I built my front bumper using 3/8” steel runners down the side of the frame to help reinforce this area. To utilize the extra bolt, I simply removed the bumper, drilled a ¾” hole, and installed a 5/8” x 3 ½” bolt through the bumper, frame and mount. Super strong!
After this step, tighten the hoses, making sure they don’t rub on anything and reinstall the steering shaft, tie rod, and steering cross-brace if applicable. Ok, it’s in, but how do we test it? We had lots of conversation about this, with ideas like intentionally running the CJ into boulders or hitting the Big Daddy Offroad Mount with a sledgehammer. But we weren’t really interested in the first choice and why ruin a perfectly good sledge? There’s no question that this mount is much, much stronger than the stock one, and with the extra 5/8” bolt, adds significant strength at the frame. If you run a CJ with big tires, this one’s for you! Looking to get a Big Daddy Offroad CJ Steering Box Bracket for your rig? Visit www.4x4rockshop.com
|
|||||||||||||||

|
Help spread the ROCKCRAWLER world!
|