|
|
|||||||||||||
|
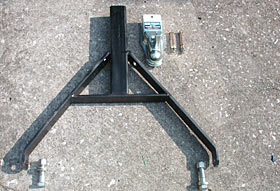
We
had used a trailer to get our Jeep to Moab, so we didn't get a chance
to use the tow bar. Once we got back home, we assembled the tow
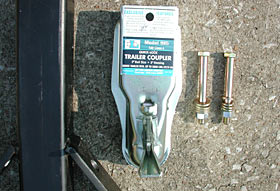
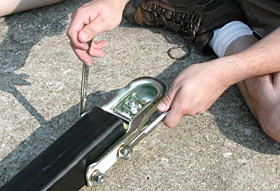
bar and gave it a try. We ordered ours with everything we'd need
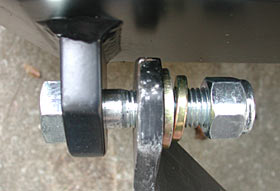
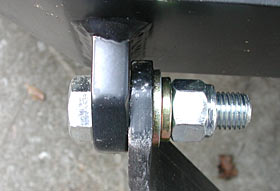
to attach to a 2" ball, including the coupler. Assembly was
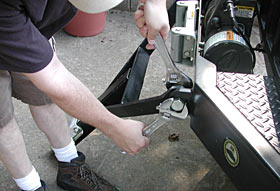
straight-forward. The coupler bolts on to the towbar and the towbar
attaches to the bumper using the D-ring brackets. At first, it seemed
like the towbar arms were too close together, however, once we got
the giant bolts tightened, they drew the towbar outward to the perfect
width. Again, Bulletproof manufactured to exact dimensions.
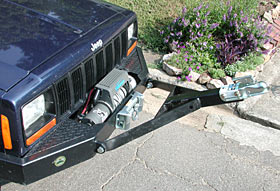
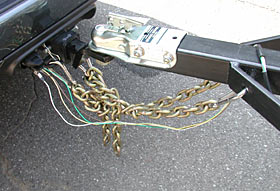
The towbar worked as expected. Using our safety chains and lights, we hooked the Cherokee up to our truck and took the Jeep for a ride. When not in use, the towbar can be disconnected. If you order your front bumper with a grill guard, you can rotate the towbar up and bungee cord it in place, however, we wouldn't recommend this for normal driving. So if it sounds like we're totally happy with our Bulletproof bumpers, it's because we are. They look exactly how we wanted them to, and they put up with all the abuse we could throw at them in Moab and back home on the rock-strewn trails of Alabama and Tennessee. We have every confidence that our bumpers will keep their form over the years, but if they don't, Bulletproof's will replace them for free under warranty - and that's a deal we just couldn't pass up.
|
|||||||||||||

|
Help spread the ROCKCRAWLER world!
Share on Facebook
|