|
|
|||||||||||||
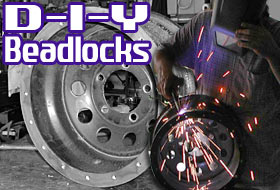
 If
you’ve ever blown a bead while off-roading, you have probably
thought about getting bead-locked wheels on your rig. There are
obvious advantages and disadvantages to beadlocks, but it’s
not our intent to go into them here. If you’ve decided beadlocks
are for you, but you just don't have the big bucks to by the fancy,
professionally built ones, like my friend Karl, here’s a relatively
inexpensive way to get them. Do it yourself! If
you’ve ever blown a bead while off-roading, you have probably
thought about getting bead-locked wheels on your rig. There are
obvious advantages and disadvantages to beadlocks, but it’s
not our intent to go into them here. If you’ve decided beadlocks
are for you, but you just don't have the big bucks to by the fancy,
professionally built ones, like my friend Karl, here’s a relatively
inexpensive way to get them. Do it yourself!
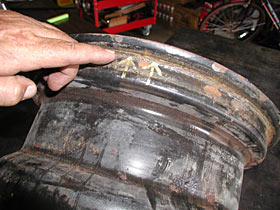
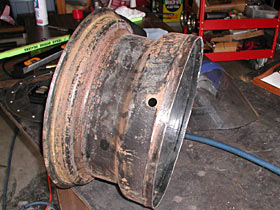
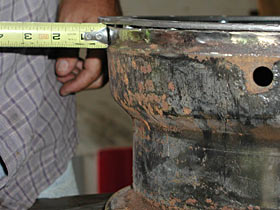
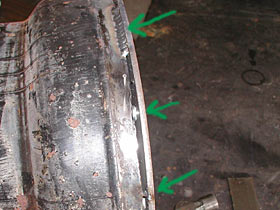
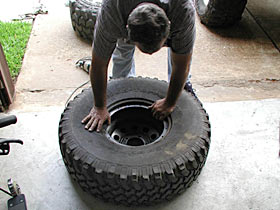
We started with a set of steel wheels that have seen their share of rocks. In fact, a couple had severe cases of rock rash and were prime beadlock material. The beadlock rings themselves were made by Carmen Manufacturing and obtained from Bush Hog Racing in The Woodlands, Texas (800) 340-7223. Beadlocks with steel outer rings are $49.95 per wheel and aluminum outer ring sets are $79.95 per wheel. We decided to go with the steel outer rims for durability. The first step in the installation is to cut off the outer bead of the wheel. This can be accomplished several different ways. One would be to pay a machine shop to remove it on a lathe. Another is to remove the outer rim with a plasma cutter. Since the machine shop wanted at least $25 a wheel and Karl already had a plasma cutter, we obviously chose the second method. The lathe would have made a straighter cut, but the plasma cutter worked just fine. Yes, it required a bit of work with a grinder to square up the edge prior to welding, but if you’re careful, and use the groove of the outer bead as indicated by the arrows in the photo to guide the plasma cutter, it won’t be too bad.
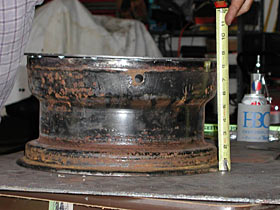
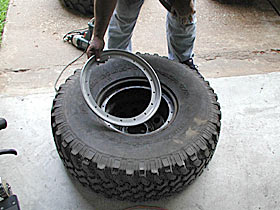
After you’ve cut off the outer rim by the method of your choice, place the inner rim on the wheel and measure carefully in numerous places to insure the inner beadlock rim will be parallel to the inner bead. Then, measure around the circumference of the rim to make sure it’s centered properly.
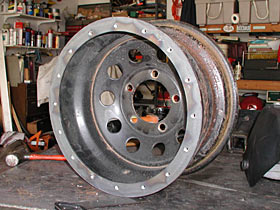
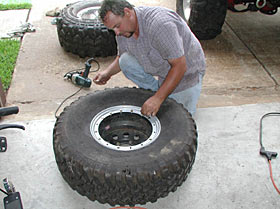
Once you’re certain it’s centered, tack weld it in place a few places around the rim and double-check all of your measurements. Once you’re certain that they are OK, finish welding all the way around the rim. At first, we thought it would be a good idea to only do several inches at a time to avoid warping, but we found that this would only cause pin holes and subsequent leaks. To stop this, seal the welds with a film of silicone, just in case.
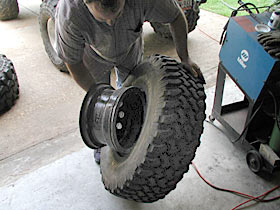
When your wheel is finished, clean it up, put on a coat of paint, and you’re ready to mount the tire. Mount it as you normally would, from the inside of your tire. Center the tire on the inner beadlock rim, and place the outer rim over the tire.
You may need to use several longer bolts, evenly spaced around the beadlock to start drawing the inner and outer locks together. Then install all provided bolts and tighten them down evenly in a crisscross pattern. You’ll need to go around a few times before they are actually tight. Air up the tire, check for leaks, and bolt it on your truck. Now, only three more to go… Editor's Notes:
|
|||||||||||||

|
Help spread the ROCKCRAWLER world!
|