|
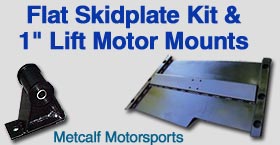
Metcalf Motorsports Flat Skidplate Package
Motor
Mounts
|
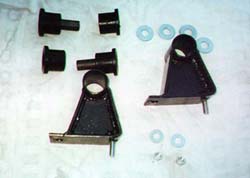
Metcalf's
motor mounts are pure beef. We are talking U.S.D.A. Grade A! They
are made of 3/16" steel, template cut and formed. Like the stock
mounts, one mounting bolt is permanently welded into the mount,
and another bolt is provided that screws into the welded nut on
the bottom of the frame mount. All other necessary nuts, washers
and bushings are also provided.
|
 |
|
|
|
|
|
The mounts are essentially a piece of tube at the top that the
bushing rides in. This tube is welded to two upright pieces of
steel. Metcalf forms one longer piece of steel to create one of
the sides as well as the bottom part of the mount.
What sets these motor mounts apart from those made by other companies
is the center section. All other companies leave the center section
open, while Metcalf welds one last piece of steel to the inside
that bonds the two sides, the bottom, and the top tube. This will
keep the weight and torque of the engine from eventually causing
the two side pieces to bend outward. Excellent design.
|
|
|
|
|
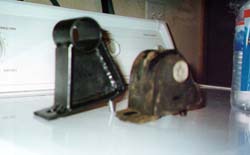
The mounts are perfectly matched, heightwise. This is important
to keep the engine balanced. The main bolt hole measured exactly
1.25" higher than the hole on the stock mounts. The welds were
clean and consistent, and the black paint was well-applied. The
polyurethane bushings (and metal bushing that rides inside of
the poly) fit snugly.
|
 |
|
|
|
|
Installing
the mounts was a piece of cake:
|
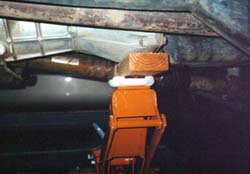
Place a floor jack under the transmission. Be sure to use a flat
block of wood atop the jack to spread the load a bit. Also chock
the wheels for safety. Jack up until the jack is snug under the
tranny.
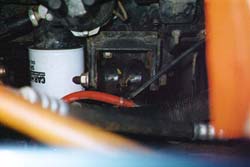
Remove the large nut on the main bolt of the driver and passenger
side motor mounts. Also loosen the four nuts that hold the transfer
case to the transfer case skid plate. This will allow the drivetrain
to move easier.
|
|
|
|
 |
Have
a friend jack up the floor jack slowly until you feel the main
bolts in the stock motor mounts loosen. They will slide right
out with the jack at the right height. Remove the bolts.
Make sure the jack is secure. Remove the motor mount mounting
bolts. For each mount there is one bolt that threads into a nut
welded to the frame, and one nut that threads onto a bolt on each
motor mount.
|
|
|
|
 |
Remove the stock motor mounts. Place the Metcalf mounts onto the
frame in the stock locations. Because the mounts have a bolt welded
in permanently, like the stock mounts, its easy to tell which
way they go.
Loosely install the mounting nuts and bolts provided. Again, one
loose bolt threads into a nut welded to the frame, and one loose
nut threads onto the bolt welded to the mount.
|
|
|
|
 |
Jack
up the engine until the main bolts slide into the taller mounts.
Install the main nuts. Use Loktite or similar thread locking solution.
Tighten the mounting hardware very snugly and, again, use Loktite.
Retighten the four transfer case skid plate nuts and remove the
jack. Check all bolts again in a week.
|
After the install, crawl under the Jeep and check all frame or engine
to body connections for stretching. Check hoses, cables, brake and fuel
lines. Relieve tension as necessary.
The installation is very easy and should take less than an hour with
a friend. I have had them in for almost two months, and through daily
driving and two 4x4 trips, they have held up perfectly.
As expected, there is some engine vibration transmitted to the body.
Its really almost unnoticeable after a few days. After a week I didn't
notice it unless I was specifically thinking about it. And, you'll only
feel it when the vehicle is sitting still. Once you begin to move, it
is absolutely transparent.
Flat
Skidplate Install
©
2000 Rockcrawler. All Rights Reserved
|