s s |
Rubicon
Express Extreme Duty 5.5” TJ Lift Kit
By Chad Crowell
|
|
SKIDPLATE
INSTALLATION
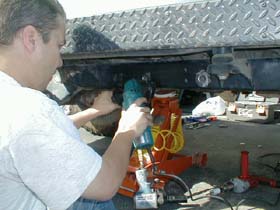
I painted the
OME shocks black last week so they don’t stand out like a sore
thumb. That yellow is pretty bright! I also re-installed my stock
crossmember, removing my Metcalf
flat skid, so that I wouldn’t have to deal with any surprises
that came from that past installation. I brought the whole lift
down to a shop we have at work that has a large air compressor and
welder. I also brought along Bryan to help out. We have a total
of 6 jack stands and 3 floor jacks.
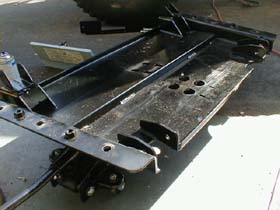
The crossmember
is constructed of ¼” thick steel plate. It is formed and cut
as necessary to create a plate that is strong enough to support
the drivetrain, as well as provide a solid mounting point for the
arms. The frame brackets help distribute the weight and force exerted
from the axles on the sides of the frame as well as the bottom.
A total of 16 bolts mate the crossmember and brackets to the frame.
|
|
|
|
The
crossmember is formed from 1/4 inch plate steel.
|
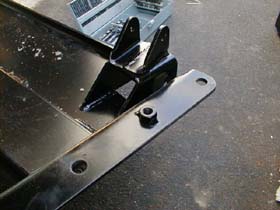
Welds
are complete and brackets are strong.
|
The arm mounting
flanges are welded to the crossmember with good-looking beads and
the whole thing is black powdercoated. The crossmember weighs a
good 60 pounds, and is obviously much thicker and stronger than
the stock one. The plate also is engineered to provide about 1”
more clearance than the stock plate. Along with the taller springs,
this provides 2-3” more clearance under the belly. All hardware
provided is Grade 5 or 8.
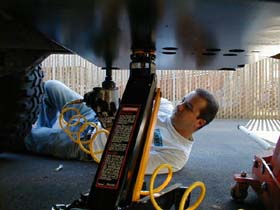
- Chock the
vehicle wheels and set the brake.
- Place a
tall floor jack under the transmission with a piece of wood on
it to spread the weight out.
- Remove the
four nuts holding the transfer case to the stock crossmember.
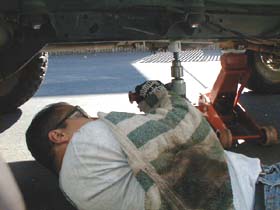
- Jack up
the transmission a bit.
- Place a
floor jack under the stock crossmember.
- Remove the
6 bolts attaching the stock crossmember to the frame.
- Lower the
stock crossmember out of the way and toss it like a Frisbee. You
may also want to remove your stock exhaust system from the catalytic
converter back to the tail pipe at this time.
|
|
|
|
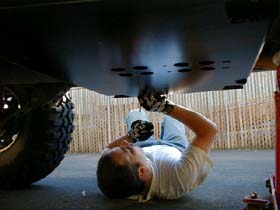
Four
nuts attach the transfer case to the crossmember.
|
Change
your fluids if you have time...easier now then ever again!
|
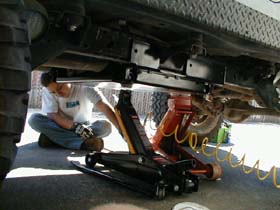
- Raise the
RE crossmember up to the frame and bolt it in using the six original
holes. You may want to lower the transmission jack to make sure
the tranny mount and holes in the skidplate line up correctly.
Keep in mind the plate is sitting a little lower due to the nutserts
that don’t yet pass into the frame.
- Mark the
four new holes to be drilled in the bottom of the frame by placing
a punch through the nutsert on the crossmember and making a mark
on the frame.
|
|
|
The
nutserts on the plate will bolt up securely against the
frame.
|
Use
a punch to mark the center of the holes to be drilled.
|
- Lower the
RE crossmember away.
- Drill a
pilot hole for the four 1” holes to be drilled in the frame.
- Drill the
four 1 1/2” holes using a hole saw and low speed drill (holes
were larger than planned to clear the nutsert welds).
- Clean the
new holes and paint to prevent rust.
- Raise the
RE crossmember up to the frame again. The nutserts should align
with the holes just drilled and the plate should fit up flush
and squarely to the frame.
- Install
the frame brackets to the frame/crossmember and bolt them up along
with the crossmember by bolting in the five lower bolts on each
frame rail. Make sure the brackets sit flush against the side
of the frame.
|
|
|
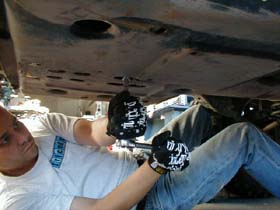
Prepare to have some tired shoulders. |
Fits perfectly! |
- After checking
fitment of the crossmember and the brackets, mark the holes to
be drilled on the frame sides with a punch. There are three on
each frame rail.
- Remove the
crossmember and brackets.
- Drill a
pilot hole for the six 1” holes to be drilled in the sides
of the frame.
- Drill the
six 1” holes using a hole saw and low speed drill. Only drill
the outside of the frame.
- You will
now need to pilot drill the inside of the frame rails with the
center drill bit on your 1” hole saw. The 1” hole saw
in the just-drilled 1” hole will help you center the back
side pilot hole.
- Drill out
the inner frame rail holes with a ½” drill bit.
- If you won’t
be welding the frame sleeves in, clean the new holes and paint
to prevent rust and skip to step 28. Otherwise, clean the paint
off the frame in the area where the sleeves will be welded in.

|
|
|
More tired shoulders. |
Clean the paint from the area to be welded. |
- Place a
provided bolt through a sleeve, then place the sleeve into one
of the holes just drilled. Use the bolt to hold the sleeve and
keep from dropping it in the frame.
- Align the
sleeve to the inner hole, and tack weld it in.
- Repeat for
the other five bolts.
- You may
want to test fit the plate and brackets for full bolt up before
fully welding the sleeves in.
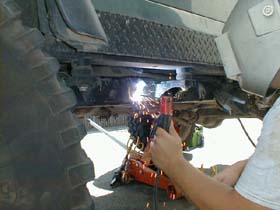
- Weld the
sleeves in. Clean the areas and paint to prevent rust.
- Raise the
plate and brackets into place, installing the 8 bolts per side
as you go. Tighten up the bolts (and the nuts on the inside of
the frame rails) and torque to 130 ft. lbs. Torque the bolts in
the bottom of the frame to 65 ft. lbs. Be careful not to strip
the factory nutserts in the frame. They tend to be soft and strip
quite easily. Lower the transmission jack. The tranny mount bolts
should pass into the appropriate holes in the new crossmember.
|
|
|
Welding the sleeves in. |
Sleeves painted and ready for installation. |
- Reinstall
the four original tranny mount bolts.
- Double check
all cables and wires near the area for clearance.
- Double check
all bolts after Jeep is driven.
That wasn’t
too bad…actually went quite a lot faster than I thought it
would. Due to the skidplate holding the rear of the drivetrain up
a bit higher, your rear driveshaft angle could be off. Also make
sure your fan isn’t hitting its shroud. If you drive the vehicle
as is and aren’t installing the rest of the lift immediately,
you may want to remove the rear driveshaft to eliminate vibrations.
Of course, in a TJ you can drive in 4Hi with the rear driveshaft
removed.

|
|
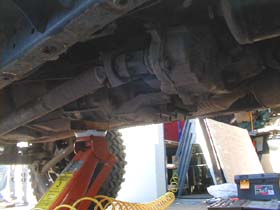
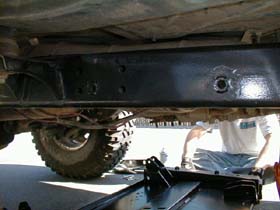
Click
to enlarge. The new crossmember installed.
|
Its pretty neat
looking at the new skidplate and seeing 8 bolts holding it in on
each side. It looks as strong as it is. It fit up perfectly, no
need to enlarge or file out any holes anywhere. And the tranny mount
slid right into the holes provided for it.
Once you get
the new skidplate on, you’ll notice that the muffler will be
in the way of the passenger side control arm mounts. Originally,
Rubicon Express furnished a kit with a bent rear upper arm to clear
the stock muffler, but that is no longer an option. You will be
required to buy a new muffler, and probably new exhaust piping.
There is also a chance that, without a body lift, the muffler will
also rub the heat shield above it.
I was told by
Rubicon Express that a small aftermarket replacement muffler would
work, and I ordered a 6” round muffler that didn’t come
close to fitting. Rather than trying a 4” or 3” round
one, I decided to take it to a local muffler shop and get their
opinion. I ended up getting a completely new system on the back
side of the catalytic converter and am extremely happy with it.
Click here for the exhaust system details.
NEXT--->>
Intro | The
Plan | Skidplate | Rear
End | Front End | Impressions
|