| |
|
|
 |
Once
the Atlas II was installed with the modified crossmember
in place, we found that it fit nicely. The modification
instructions appeared to be right on, as the dropped
portion of transfer case seemed to have about two inches
of clearance between the tunnel and the crossmember.
Keep
in mind that cutting a gap in the crossmember adversely
affects its structural integrity. I've found this compromise
to be minimal, but you may want to reinforce this modification
depending on how much time you spend on your belly. |
|
 |
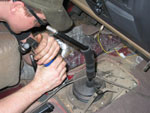
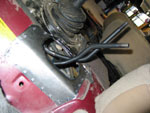
With
the actual Atlas II drivetrain modification complete,
Steve could move on to installing the shift levers.
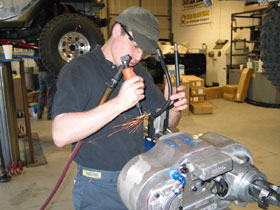
After
a test fit, Steve lowered the transfer case back down
to finalize the position of the adjustable shift levers.
He then notched the threads on the links to prevent
them from vibrating off while driving. He ground down
the corners at the base of the levers to prevent them
from from hitting the sheet metal when in certain positions.
|
|
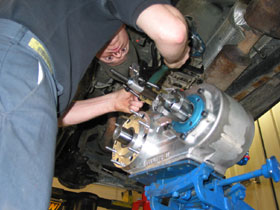 |
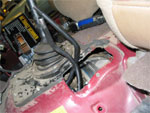
He
then painted exposed metal, greased up the linkage at
the zerk fittings, and reinstalled the Atlas II, feeding
the shift levers through the hole in the floor. The
rest of the work could now be finished from inside the
Jeep.
As
is, the movement of the Atlas II shift levers was extremely
limited, so he had to cut a relatively small section
of metal away from the front of the hole in the floor.
Without doing so, the Atlas II wouldn't engage in low
range because the levers were obstructed. |
|
Once
the hole was large enough for the shift levers to move completely
unobstructed with the center console installed, Steve cut a
perfect oval out of a square piece of sheet metal. He placed
the the sheetmetal over the enlarged hole, and riveted it to
the floor. He then painted the sheet metal addition, and mounted
the boot around the shift levers. Be sure to grease the boot
and invert it before reinstalling the center console, and be
sure the levers don't bind up on the boot before final assembly.
Even though
I summed up the lever installation process in about a half-dozen
sentences, don't be fooled! This is possibly the most difficult
part of the installation, depending on your vehicle. It took
Steve several frustrating attempts to get it "just right".
| |
|
|
|
 |
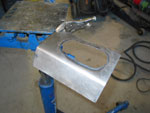
| Installed
sheetmetal plate. |
|
|
|
|
|
|
 |
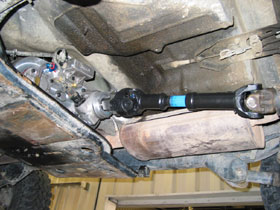
With
the 32 spline front output upgrade, our existing front
driveshaft was too long, so we sent it out to get shortened
exactly four inches. The front driveshaft does not need
to be shortened quite as much with the normal 26 spline
front output.
In
retrospect, I had underestimated the amount of fabrication
that was involved to install an Atlas II transfer case.
This is going to be of little concern for most of you
who are interested in a functional work-horse of a transfer
case. Such a modification might be too involved for
a casual four-wheeling enthusiast to justify, especially
if vehicle resale is a concern, as it is more difficult
to reverse than a bolt-on solution. Otherwise, the performance
value of the product greatly outweighs the work involved
to install it. |
|
 |
Overall,
I am pleased with the installation. It took about twelve
hours from start to finish at a healthy pace. If you
aren't doing it yourself, expect the shop to have your
vehicle for at least two days.
Immediately
following the installation, we took the Jeep on a trip
down the road in high range and in a stone parking lot
in low range and the transfer case worked fine.
Next,
we will be taking our Jeep Wrangler TJ out on the trail
with this great new transfer case. You'll be able to
read about it here in another article soon! |
|
| RESOURCES |
Advance
Adapters
4320 Aerotech Center Way
Paso Robles, CA 93446
Phone: (805) 238-7000
or (800) 350-2223
www.advanceadapters.com
|
OK
Auto, 4wd & Tire
2621 State Route 57
Stewartsville, NJ 08886
Phone: (908) 454-6973
www.ok4wd.com
|
 |
Chris
Shontz is a staff-writer for Rockcrawler.com. Located in Pennsylvania,
Chris has made it his life's mission to prove to the world that
real trailriding does exist on the East Coast. |
|
|