Back to Features Page Ray Woo installs the AirLift Rear Air Suspension By, Ray Woo |
|
|
AirLift®
Rear Air Suspension
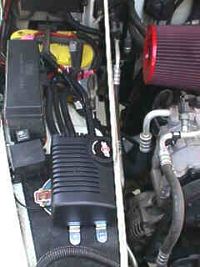
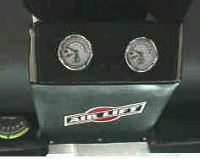
AirLift's instructions state that the compressor can be mounted anywhere under the vehicle against the framerails. I chose to mount the compressor in the engine compartment to minimize water and dirt contamination. Unfortunately, space within a 6 cylinder-equipped TJ is scarce. The stock airbox and filter element was removed and the steel accessory platform from Turbo City was installed using the original airbox mounting holes. The compressor was mounted onto this. I chose to install Turbo City's Rock-It intake plenum tube and a PowerStack open air filter in place of the stock units. The PowerStack is similar to the K&N product, but is also open at the end. This was purchased from Rubicon Express. A single semi-rigid airhose connects the compressor through a T-fitting to each solenoid, which in turn is routed to each bag's airline near the bleed valves. There are a lot of hoses and wiring that I wrapped in flexible plastic loom material (found at any Radio Shack) to protect it and make it more aesthetically appealing. The kit includes a mounting bracket for the power switch and the pressure dials and air release valves for each bag. I decided to mount the controls on my rollcage, and fabricated a custom enclosure for it.
It took me a Saturday night and a Sunday afternoon to do all this by myself in the garage. The instructions from AirLift are slightly confusing so installing the first airbag took all Saturday night, but the other side took only 2 hours on Sunday. Most of the time was spent finding the best way to route the hoses and wires.
|
|
 I
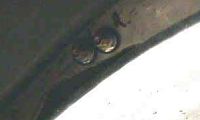
chose to run the airlines to the compressor along the driver side framerail
to minimize the risk of heat damage from the exhaust system. The line
from the passenger side bag follows the rear brake line over the top
of the axle to the driver's side. The airlines from each bag then run
towards the driver side rear fenderwell where two holes were drilled
in the body flange and the external bleed valves for each bag were mounted.
This body flange was accessible for use due to the 1" body lift installed
on JeepThing. These valves can be used to air up the bags in case of
compressor failure, or to bleed the system if the solenoid valves fail.
I
chose to run the airlines to the compressor along the driver side framerail
to minimize the risk of heat damage from the exhaust system. The line
from the passenger side bag follows the rear brake line over the top
of the axle to the driver's side. The airlines from each bag then run
towards the driver side rear fenderwell where two holes were drilled
in the body flange and the external bleed valves for each bag were mounted.
This body flange was accessible for use due to the 1" body lift installed
on JeepThing. These valves can be used to air up the bags in case of
compressor failure, or to bleed the system if the solenoid valves fail.