|
|
|||||||||||||||||||||
|
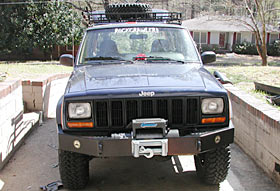
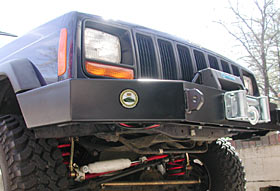
Once the ROCKBOX got side Boulder Bars for rocker protection, it was time to turn to the front and rear bumpers and assess what we wanted to do there. We discussed the different options and decided that we would look at our requirements and see who made a bumper that met them. Here's what we came up with.
We looked at just about every major bumper manufacturer and narrowed them down until we came to Bulletproof Manufacturing. Now in all fairness, we already have Bulletproof bumpers on our Wrangler, so we are very familiar with them and how they hold up over the years. When we were looking around at other companies' bumpers, we simply could not find a matching pair that both met our requirements and looked the way we wanted. Confident that Bulletproof would be able to get us exactly what we wanted and get it to us in time for Moab Easter Jeep Safari, we called up and placed our order.
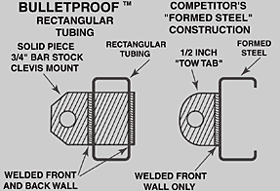
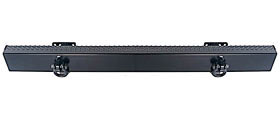
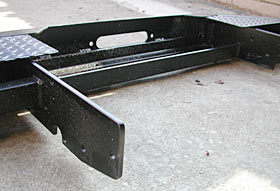
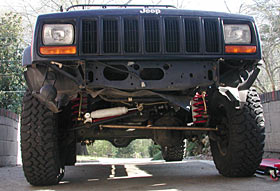
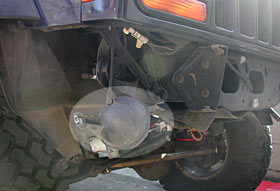
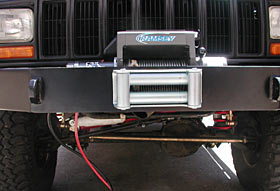
One of the things that sets Bulletproof apart from their competitors is how they build the bumpers. While some bumpers are made of formed steel, Bulletproofs are made of rectangular tubing, meaning there is no open back-side, making the bumpers much stronger. In addition, clevis/tow-bar mounts are made for 3/4" bar stock steel and go through the bumper and are welded at both ends, ensuring a strong mounting point. Once complete, the bumpers are beautifully powder-coated black. The front bumper we chose is a plain-Jane FF3L, which is made from 2” x 6” rectangle tubing with a 3/16” wall, as well as 3/8” angle, 3/8” plate and 1/4” plate. The top surface has diamond plate sections and the end caps are entirely welded, ground flush and completely sealed. It also has two D-rings. Several other models are offered with various grill guards and headlight loop guards, but we wanted ours to be basic and low-profile. The rear bumper is the FF3LR-REC-SHK, which is made from 2” x 5” rectangle tubing with a 3/16” wall. Like the front, the end caps are entirely welded ground flush and completely sealed. This model includes a 2" receiver for towing, so it uses the same holes in the frame that you'd use if you had a hitch. The bumper is rated for 10,000 pounds and also has 2 D-rings and an air tank. We decided to mount our spare tire on a Wilderness rack on the roof, however, Bulletproof does offer a swing-out tire carrier, as well as Gerry can mounts if desired.
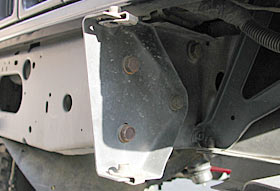
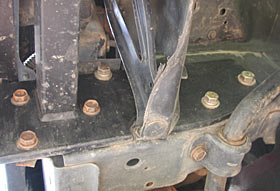
Installation of the front bumper is fairly straight-forward. Bulletproof bumpers are made to extremely strict tolerances, and it is easy to think your bumpers were not made right if you don't line them up perfectly. Patience pays off when you realize just how perfect they do fit and you get everything put on right. Bulletproof provides all the hardware you need to mount your bumpers. Our bumpers were sent in a hurry so we could get going to Moab and we got shorted on a few bolt/washer/nut combos. It was not a big deal because they were standard Grade 8 and were available at Lowe's for just a couple dollars..
Pulling off the stock bumper is not a terribly difficult task, however, some of the bolts and screws in the frame and supports are a bit tricky to get to, so have various-sized tools handy. One thing you will need to figure out is a new place to house your vacuum ball. This baseball-sized plastic ball mounts inside the original bumper and has nowhere to live once you put the Bulletproof on. We tried tie-wrapping it to the frame for starters. During a long ride home on a hot summer night, our air conditioning stopped blowing out of the vents. A road-side inspection revealed that we had lost the ball somewhere on a trail or road. Plugging the hose got us home and we got a new ball the next day. We relocated the ball inside the engine compartment and everything works just fine now.
In addition to the ball, you will also need to do some trimming of the plastic inside the wheel wells. Because of the shape and size of the new bumper, the plastic does not look good and must be trimmed down and smoothed out so it's not sticking out or looking out of place. The trimming is easily done using a cutting wheel such as a RotoZip.
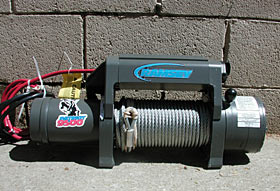
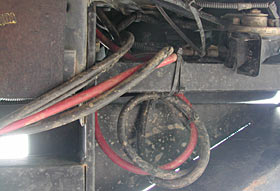
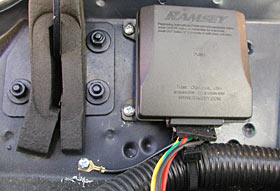
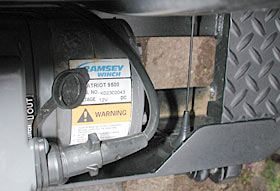
Once you get the bumper in place and the plastic trimmed, it's time to put the winch in. Over the years we have been very happy with the Ramsey winches we've owned, which have included a Pro Plus 9000, a Platinum 9000, and a special-edition Bad Boy Platinum 9500. Having given us flawless performance, we decided to go with the latest winch Ramsey has to offer - the Pariot 9500. Once again, our bumper was made with extremely tight tolerances. We lowered the winch down into the hole at a very slight angle and the feet got stuck in the bumper. A pry bar was needed to get the winch back out. We discovered the trick was to lower it perfectly straight and lined-up with the bolt holes in the bottom, because once it was in wedged in place, it wasn't moving. Though this sounds a bit like a pain, it actually is quite nice. We don't expect any thieves to be making off with our winch very easily!
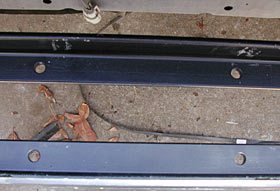
Cabling for the winch is easily run underneath the bumper and through the front of the Jeep and to the battery. We circled our extra power cable and tie-wrapped it snug up inside the bumper, out of harm's way. Our roller fairlead mounted perfectly to the holes on the front of the bumper and winch was ready to go.
|
|||||||||||||||||||||

 Bulletproof
bumpers are hand-made by expert metal workers and welders. As such,
they do take time to build and ship. When you order a set of them,
you should not expect all models to ship immediately - especially
if you ask for custom modifications. While some models are kept
in stock, others may take a few weeks to produce and ship out. Our
Cherokee bumpers showed up just in the nick of time for us to get
them on for our trip to Moab. Like everything else we did on the
ROCKBOX project, we were bolting on parts right up to the minute
we left. In fact, the diamond plate guards that go behind the rear
wheels had their holes incorrectly drilled and the folks at Bulletproof
made a new set, which were waiting for us at our motel in Moab when
we arrived.
Bulletproof
bumpers are hand-made by expert metal workers and welders. As such,
they do take time to build and ship. When you order a set of them,
you should not expect all models to ship immediately - especially
if you ask for custom modifications. While some models are kept
in stock, others may take a few weeks to produce and ship out. Our
Cherokee bumpers showed up just in the nick of time for us to get
them on for our trip to Moab. Like everything else we did on the
ROCKBOX project, we were bolting on parts right up to the minute
we left. In fact, the diamond plate guards that go behind the rear
wheels had their holes incorrectly drilled and the folks at Bulletproof
made a new set, which were waiting for us at our motel in Moab when
we arrived.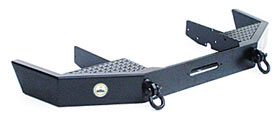
|
Help spread the ROCKCRAWLER world!
|