|
 Roll Bar/Top |
|||
|
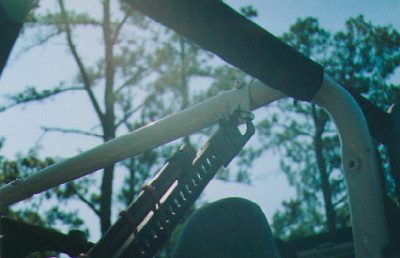
Once you have all the brackets attached, install the Hi-Lift. Using the 1/2 inch bolt run up from beneath the open V of the base bracket and through the Hi-Lift base, secure with a 1/2 inch nut or wing nut. Next, slip the top portion of the Hi-Lift from the bottom up into the rollbar bracket. (I had to move the Hi-Lift top portion down to the next hole to make this fit). Slip the pull pin through the loop at the end of the bracket, and insert pull pin, and secure with cotter pin or similar pin. And that about covers it. Other than using some bungie cords wrapped around the handle to keep things a little bit more quite, this set up has worked great for me. While running down at Clayton, OK with TXJEEPER and some others, I got a chance to use the set up on a fellow Jeepers Jeep that got stabbed by a stick in the sidewall of his tire. (See pictures in Clayton portion of Rockcrawler). I had my Hi-Lift out within a minute. Release the nut that holds the Hi-Lift's base, pull the rollbar bracket's pull pin, and out it comes. This little set up is pretty handy, in my opinion. I hope this will give you another take on just one of many ways to secure your Hi-Lift. I also hope that my brief outline of the construction of my set up and the accompanying photos will help you should you like this idea and want to use it on your Jeep. If you have any questions, please feel free to email me at TJ4PAW4@webtv.net and I'll be glad to answer or help in any way that I can. |
||||