Off Road Engineering
Back to Tech Reports Main Page

Rockcrawler.com
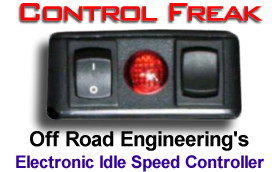
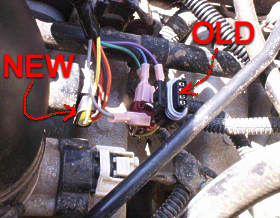
Back to Features Page

ROCKCRAWLER installs Off Road Engineering's Electronic Idle Speed Controller in the Project TJ.

By, TXJEEPER

Throttle
Step 6 While the controller is still loose, pass your wiring harness through the firewall.

Throttle
Step 7 Put the rubber plug back in and wrap it around the wiring harness. We used some silicone-based putty to seal around the rubber plug to seal it.


Throttle
Step 8 Locate the idle speed motor, right next to the throttle body. It's right next to where the big air intake hose hooks up. You'll see a plug here that matches the one on your new controller. Pull this plug out and cover it well with electrical tape in case you ever need it later.

Throttle
Step 9 You'll notice that the plug has A B C D printed on it. Clamp on the 4 red t-taps into the original harness just below the plug. Then, following the chart in the instructions, hook up your four wires. Now, plug the new harness into the idle speed motor. Secure your harness with the included tie-wraps.


Throttle

Step 10 Finally, put your dash panels back on and find a place to mount the unit. We chose to mount ours underneath the wiper arm to the right of the steering wheel and under the dash. You can use the existing screw hole, however, the included screw will not be long enough. You can also use the included industrial-strength Velcro, if you like. A hole could be drilled in the panel to pass the wires through, but we decided that for now, we'd just pass it through the rubber gasket around the steering column. Once the controller is mounted, secure your wiring harness under the dash and you're ready to hit the trails!

WARNING: Do not under any circumstances use this device on the road or highways!


©1997-2010 ROCKCRAWLER 4x4 and Off-Road Magazine. All Rights Reserved.