|
If
you read my last article on Off
Your Rocker Panels body armor, you know that I am very
pleased with the products that come out of Dan Duffy's shop.
I had Dan send me a set of his Rocker Guards to match the
corner guards I installed on the TJ several months ago.
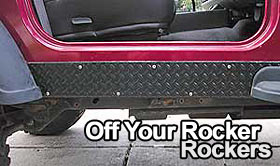
Off
Your Rocker Panels manufactures corner guards and rocker
panel guards for Jeeps from 1955 to present. These panels
are beefy!
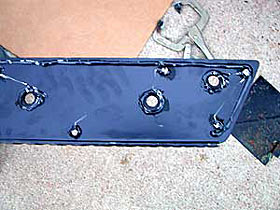
When
the boxes arrived, the contents were well-packed to prevent
any damage during shipping. The rocker guards come with stainless
steel mounting hardware and include instructions that are
very straightforward.
|
Tools
Required:
- Electric
Drill, 1/4", 1/2", 1-1/2" drill bit.
- Hammer
& center punch.
- Large
locking clamps.
- Silicone
sealer.
- 5/16"
wrench and socket.
- 4mm
Allen head wrench.
- (4)
1-1/4 Hole plugs
- Masking
tape
|
| |
|
The
installation will take a full day to complete.
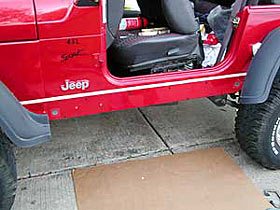
First,
remove the flare extension and flares. (Dan's instructions
say to remove the flares, but I opted to just unbolt them
enough to get access to the rocker panel area.) I did have
to remove the tube steps to get better access to the rocker
area.
|
|
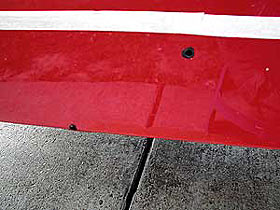
You will need
to drill holes in the guards to match the factory body holes for
the flare and flare extension bolts. Here's how I made the rocker
guards stay in place to drill the holes.
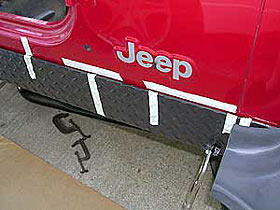
Clamp one of
the rocker guards in position. I used masking tape on the tub to
mark the top edge of the panel. You can look down between the tub
and the panel and see the factory flare mounting holes. To make
the panels sit flush with the tub and to bolt the flares back on
you will need to drill holes to expose the mounting nuts. Using
the eyeball method, I put a vertical strip of masking tape on each
side of the mounting nut.
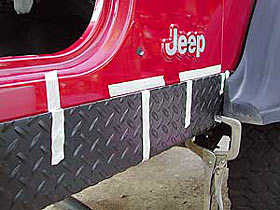
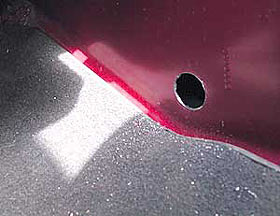
After all
the areas are marked, remove the panel. Using the tape mark on
the tub, measure down to the centerline of each mounting hole.
Mark the panel in between each piece of tape with the measurements
taken from the tub. Center punch the line and drill a ½
inch hole at each location. As you can see, when you place the
guard back into position, you can now access the mount points
to re-attach the flares.
Once you have
finished making these holes, clamp the guards back into position.
You now need to lay out the mounting bolts for the rocker guard.
Using a tape measure, evenly space out the bolt locations along
the top and bottom of the rocker guards. Be careful marking the
bottom layer of bolts. If you mark too low on the panel, you will
not drill into the body tub. When you are satisfied with the bolt
layout, center punch the location of each hole on the rocker guard.
Using the ¼ inch drill bit, drill through the rocker guard
and body tub at each of your center punch marks. The upper bolt
on each end of the tub will not be accessible from inside the
tub yet.
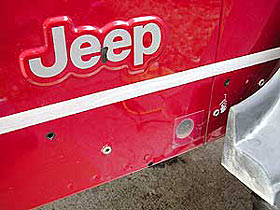
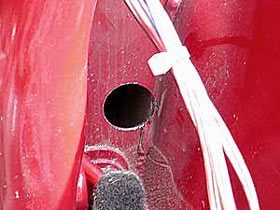
At this point
remove the guard. The upper bolt hole at each end of the tub must
be drilled through to the inner tub. You may need a longer ¼
inch bit to get this done. Once you have drilled the inner tub
you now have a pilot hole to drill a 1-1/4 inch hole from the
inside. This hole will allow you to place the nut on the bolt
when you bolt the panel in place. Once finished, you can place
a 1-1/4 inch hole plug to give the installation a finished look.
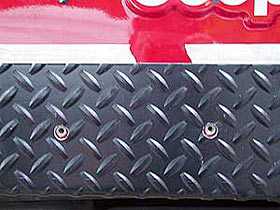
Once you have all
the holes drilled, remove any rough edges and paint the exposed
bare metal to prevent rust. You need to seal the top and sides of
the guard before bolting it into place. Sealing the guard prevents
mud and debris from collecting between the panels which would eventually
lead to rust.
I laid out a
solid, straight piece of tape on the tub across the top of where
the guard will bolt in place. This will make a straight edge on
the sealer once the panel is bolted down. When you have the sealer
applied to the guard, place it back into position and bolt it down.
Reattach the fender flares and flare extensions.
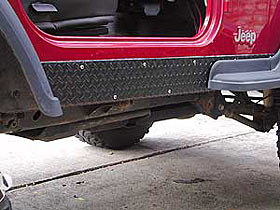
That's all there is
to it. If you want a more subtle look, you can use a black marker
to cover the heads of the bolts with black to match the diamond
plate guards.
The guards not only
look cool but add quite a bit of extra strength to your rockers.
So whether you just want to protect from potential damage in the
future or you are trying to cover up the damage from that last
unprotected run, the Off Your Rocker Rocker Guards may be just
the ticket for you.
|