|
|
Rock-Light Installation
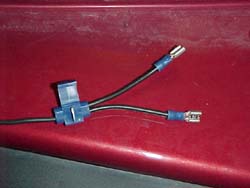 |
Step 10 If you refer to the wiring illustration on page 2, you see that the battery goes to two different points on the relay. This makes the rock-light wired in such a way that it can come on at any time, even when the TJ is off. If you wanted your rock-light to come on only if the parking lights are on, then one of these wires would be coming from the battery, and the other would be spliced to the hot parking-light wire. That is just an example. I like to be able to turn on my rock-light at campsites without my Jeep running which is why I wired it this way. A scotch-lock and two connectors make these two hot leads from the battery ready to plug into the terminals on the relay. |
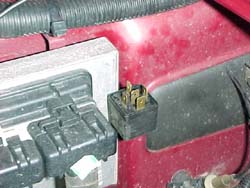 |
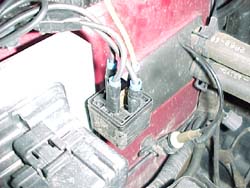
Step 11 Find a location for your relay. This was harder than I thought. I initially thought about drilling a sheetmetal screw into the firewall and fastening it there, but there was an existing hex screw next to a wiring-harness assembly behind the battery that was well-suited for the job. I didn't foresee this being an inconvenience to any future service, so I bolted it there with the terminals facing up. |
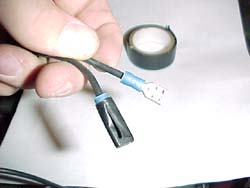 |
Step 12 To reduce the risk of corrosion, short-circuit, fire, etc... I went ahead and wrapped all connectors in electric tape. You don't need to use too much electric tape for this task - an inch per connector will suffice.You should definately do this for peace of mind more than anything! |
 |
Step 13 Go ahead and plug everything into your relay. Make sure you've got connectors on everything that fit on the relay terminals, and follow the numbers in the wiring illustration on page 2! They will tell you exactly where to plug everything in. Some relays have an extra terminal. In this case, terminal 87a, which is in the center of the relay, is not being used. If wiring a second light, this extra tab can be used to run a wire to it.I also cut a length of yellow wire to be used for the switch and plugged it into the relay. |
ON
TO PAGE 5
Wiring your switch...