|
|
Rock-Light Installation
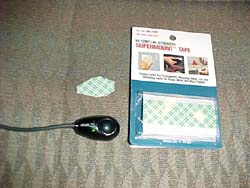 |
Part 20 Its time to find a home for the switch. As you can see, I got the double-sided adhesive tape out, because the switch didn't come with any. I also had to cut it in the shape of my switch. |
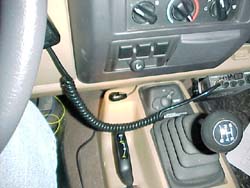 |
Part 21 There are many place you can put an accessory light switch. Alot of switches involve drilling into dash. I don't mind backcountry pinstriping, a few dents... some rock-rash... but drill into my dash? Are you nuts?! Alot of TJ owners who don't have factory fog-lights, rear wiper, or rear defrost, have three nice accessory switch bays totally open. For my rocklight, it was either these factory locations, or the IPF adhesive switch. The dealer is asking $23.00 for the factory switches! I chose the IPF switch. Either way, where you put your switch is entirely up to you. |
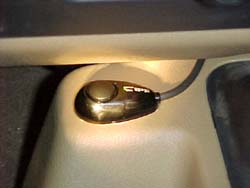 |
Part 22 This is where I finally put my switch, all ready to go. After you've neatly tucked away the loose wires under your dash, you're ready to try it out! |
 |
Part 23 Thats all there is to it! One working rock-light for the trail. An inexpensive little modification that can make your night-runs alot more enjoyable! |
|
©1997-2010 ROCKCRAWLER 4x4 and Off-Road Magazine. All Rights Reserved.
|