|
|
Rock-Light Installation
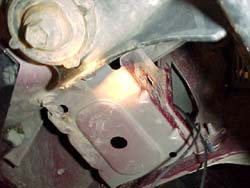 |
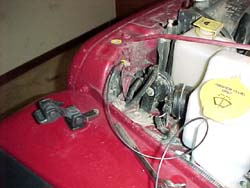
Step 1 Now its time to find a place to mount your light. Do this before anything else, because it sets your goal for the rest of the installation. On Jeep TJs, in front of the driver-side body-mount closest to the front fender, there is an existing hole located vertically and tucked up very nicely away from the ground and other potential debris. The hole faces inward so it is necessary to swivel the base of the light 90-degree so that the lamp can point away from the vehicle. When it came time to bolt the light into position, it was very difficult to reach inside, but possible nonetheless! The mounting location was further forward on the vehicle than I initially desired, but was otherwise so perfect that I couldn't resist. |
|
|
|
Step 2 Next you need a wiring plan! How are you going to do it? Where is your power source? Where is your ground? Where is your fuse... your switch? All questions you need to have answered before you begin running wires. In the above illustration (not gonna give my scratch credit enough to call it a diagram), you see what we COULD have done. Just an in-line circuit from the battery, to the fuse, to the switch, and then to the light... but no. This would be too simple! Besides, the switch I decided to use is a special switch that isn't heavy-duty enough to send that much electric through it to power the light. The switch would have gotten hot and melted, or exploded. |
|
|
|
|
Step 2 - Continued... Instead, we went by the above illustration that uses a relay. Okay, how do I describe a relay? A relay allows the light to get juice directly from the battery. It doesn't have to go through a switch first that might "bottleneck" the amount of power the light is getting. Instead, your switch is turning the relay on and off instead of the light itself. When the relay is on, the circuit between the light and the power source is closed. This allows me to use the fancy light-duty switch I chose to use without frying it, and allows the light to shine as brightly as possible. Relays make the whole deal alot more confusing than it has to be, but fortunately, the terminals on all generic automotive relays seem to be numbered the same way, so its not too difficult to figure out how the wires are supposed to go. For your convenience, I've included the numbers in the above illustration. If you plan on doing anymore lights on your vehicle, hold on to that illustration! |
 |
Step 3 We know how we're going to wire it, so now dive right in. We will begin with a ground wire. The base of the lamp on the rock-light is your ground, but if you're installing it over paint, or if you're not bolting it to your frame (and in this case we're not), you might just want to take an extra five minutes and run a wire from the base of your light, to a grounding point on your vehicle. On my TJ, I grounded the light at the same spot the horns are grounded on the driver side directly behind the headlight. Crimp loop-fasteners onto both ends of the wire and attach one end to the ground, and the other to the base of your rock-light. |
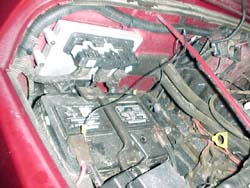 |
Step 4 Wire your hot lead. Some folks have a special box under their hood that contains a positive terminal specifically for wiring accessories like this. I don't in my TJ, nor do I have plans for any other accessories like this in the near future, so I chose to loop it to the stud directly onto the positive terminal of my battery. I highly recommend a special terminal for accessories, but if you don't have one... then this will work. Nothing is worse than an underhood rat's nest! |
 |
Step 5 Run a wire from your light to the area in your engine compartment in which you are going to mount your relay. You'll want to strip the tail on the lead coming out of the tractor light, and crimp it to a longer wire. Nothing to it! |
|
|
|
Step 5 - Continued... Here's a diag... er... I mean illustration of how the light is set up. The ground you see in the illustration is the wire you ran to the grounding-location next to your horns. The wire labelled "to relay switch" is the one you just made longer and ran up into your engine compartment. I also included a (30) to tell you that it goes to the terminal labelled "30" on your relay. We'll worry about the relay shortly. |
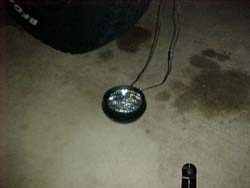 |
Step 5 - Continued some more... I included this picture of the rock-light laying on the floor next to the Jeep just to put things in perspective, and to further beat this "Step 5" to death. :) Consider this a "before" picture. |
 |
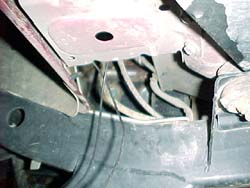
Step 6 Your rock-light is all wired now, so go ahead and bolt it up to your predetermined location. You can get that out of the way and not have to worry about it again. Make sure its aiming the right way. Also make sure your wires are tucked up above the light and not being pinched. Tighten up the stud, difficultly in the case of my TJ, and you're set! Consider this an "after" picture. |
ON
TO PAGE 3
Installing the in-line fuse...