 |
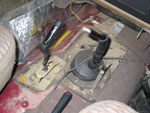
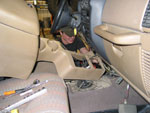
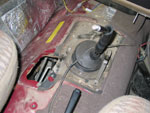
| Pulling
out center console. |
|
|
|
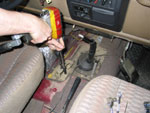 |
| Disassembling
lever bracket. |
|
|
 |
| Removed
transfer case lever. |
|
|
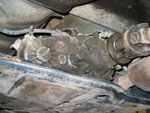
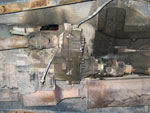
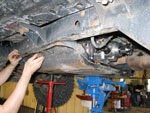
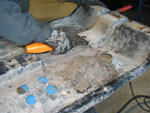
Once
the transfer case lever was removed, it was time to disassemble
and remove the old NP231 transfer case. Steve began by dropping
the crossmember and continued by disconnecting the front and
rear driveshafts, speedometer gear, and miscellaneous wiring
harnesses. Finally, he spun the nuts off the studs around the
transfer case input to disconnect it from the transmission and
set the stock transfer case on the floor.
| |
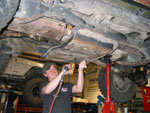 |
| Disconnecting
the crossmember. |
|
|
|
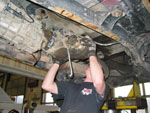 |
| Removing
the transfer case. |
|
|
| |
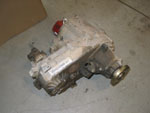 |
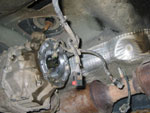
| Disconnected
transfer case. |
|
|
|
|
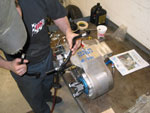
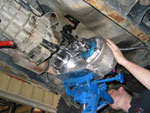
After
the old transfer case was removed from the Jeep, it was time
to begin preparation of the Atlas II transfer case. The initial
preparation begins on the bench. This involves removing several
red plastic caps and seals, put in place before shipping to
keep contanimates out of the dry transfer case.
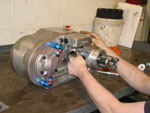
The Atlas
II is clocked by inserting studs into their respective positions
around the input circle. Clocking, or rotating, the Atlas
II allows you to find the position that offers you the best
ground clearance once installed. Be sure to leave a little
room over-top of the Atlas II to allow the driveline to move
during extreme off-road use without hitting the floor pan.
Our stock
transfer case had a stock rotation of 13 degrees, and after
doing a trial fitment, we determined that the Atlas II fit
best at the 21 degree position. If you are facing the uninstalled
Atlas II input, and looking at the top-most series of holes
around the input circle, the 21 degree position is the 2nd
hole in from the right.
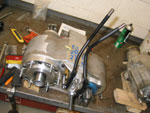
Once the
Atlas II was in place, we installed the stock speedometer
gear into the output housing and Steve preassembled the shift
linkage. This preassembly was necessary to ensure proper operation
of the Atlas II and to determine what tolerances would be
required to properly fit the new transfer case under the vehicle.
 |
| Install
speedometer gear. |
|
|
 |
| Partially-installed
input studs. |
|
|
|
|
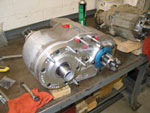
The Atlas
II is much larger than the NP231 transfer case it replaces.
With the Atlas II installed, the unmodified bracket that mounts
the drivetrain to the crossmember no longer fits properly.
It would normally bolt up to the bottom of the transmission,
extend underneath the transfer case, and bolt to the crossmember
beneath the transfer case. Modifying both the bracket and
the crossmember allows continued use of the stock mounting
hardware. In the case of the bracket, it is literally cut
in half so that it no longer extends beneath the transfer
case. It now extends straight down from the transmission where
it meets the crossmember.
It should
be noted that we followed the instructions for making these
crossmember and bracketry modifications in the "TJ"
section of the provided installation manual, but we took careful
measurements prior to doing so, because every vehicle is different
- especially if equipped with a body lift or a high-clearance
crossmember.
 |
| Mark
and measure changes. |
|
|
|
|
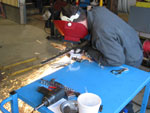
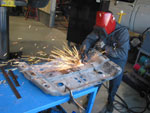
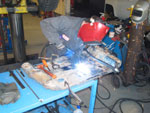
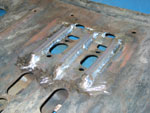
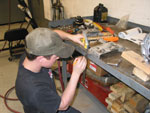
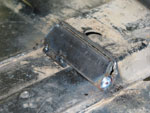
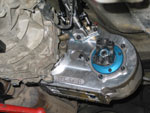
The modifications
that need to be made to the crossmember are much more involved.
The installer should have sufficient metal-working skills
to ensure proper fitment of the Atlas II transfer case. Steve
took measurements and cut a gap in the boxed section of the
crossmember to allow clearance for the left-hand drop portion
of the installed transfer case.
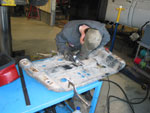
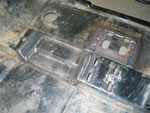
After
cutting the cap, he started work on the forward portion of
the crossmember that allows the transmission mount to seat
correctly. In this case, he had to cut around the front three
sides of the forward mounting slots that are used to provide
a mounting location for stock drivetrains with automatic transmissions.
Once three sides were cut, he used a hammer to bend it up
at an angle to match the original mounting position. Steve
then welded the forward mounting surface into its new position.
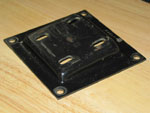 |
You
may be able to avoid or simplify this modification. There
is a plate that seats itself over these forward mounting
holes in the same manner as our modification. I believe
this plate provides the mounting surface on the crossmember
from drivetrains equipped with an automatic transmission.
You should be able to find one at a junkyard, and it should
make things a bit easier if you don't already have one.
If you have a body lift, another option is Skyjacker's
flat skid plate, which includes a mount similar to the
one pictured. |
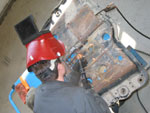
As a finishing touch, Steve welded up skid rails that would
protect the low-hanging transmission mounting bolts from getting
shaved off or damaged by the terrain.
| |
|
|
 |
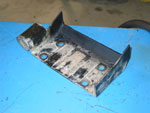
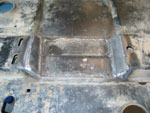
| Scooping
out the trail scum. |
|
|
 |
| Sealing
the boxed section. |
|
|
|
|
|
| |
|
|
|
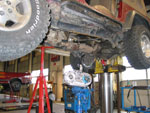
With the crossmember and bracketry modifications complete, it
was time for another test fit. What I'm not showing you is that
this is only one of many "test fits". Throughout the
entire process, Steve had the Atlas II transfer case in and
out of the Jeep several times to make adjustments. A good part
of the installation process was trial and error, but if you
have enough patience, the tedium pays off. Be careful when you
mount and unmount the Atlas II so that you do not damage the
studs. Try to slide it on and off straight and slowly.
 |
| Atlas
II on transmission jack. |
|
|
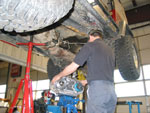 |
| Steve
adjusts Atlas II on jack. |
|
|
 |
| Raising
Atlas II into position. |
|
|
 |
| Lining
up splines and the studs. |
|
|
 |
| Installed
on transmission. |
|
|
|
|
|
CONTINUED
--->>> |