|
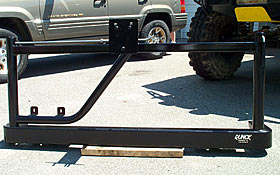
Ben Smith came by BAR Offroad on a Saturday afternoon to assist in the installation of the tire carrier. Ben is a real asset to the 4x4 community, in addition to making a fantastic product. You couldnt ask for a nicer guy and you could consider it the icing on the cake of a great product. We started the installation by opening the package to insure that all hardware was included. Since my bumper was hand-delivered, I was confident that everything would be included. However, my product was no different than what the normal consumer would receive. In fact, Ben had removed my bumper from inventory, so no special packaging was included. He brought it to me as if it were being delivered by a freight company. Speaking of which, as with most tire carriers, the carrier is too large and heavy to be delivered by conventional UPS or FedEx methods. All tire carriers are shipped via truck freight from Runck Equipment.
The Hardware
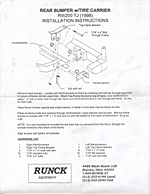
I've included a list below that shows all of the hardware that was included with the bumper/tire carrier combo. All of the hardware is Grade 8. Many manufacturers include Grade 5 hardware, which is not as strong, and will break much easier than the more desired Grade 8 hardware. Just another selling point for using Runck Equipment.
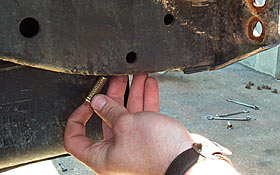
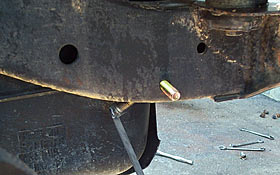
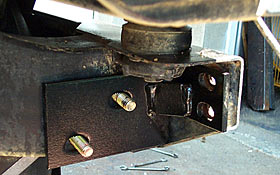
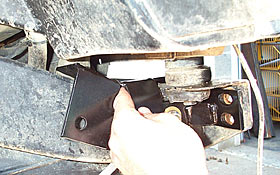
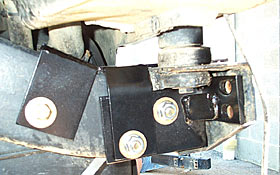
Step 1 Ben started by installing the support brackets. This procedure went very quickly, with the only snafu being one tricky bolt per side that must be slid through a hole in the frame (Figure 1). Once the brackets were in place (Figures 2 - 5), it was time to move onto the bumper. Total time to complete this initial step was about 15 minutes, including the unpacking of the bumper and all hardware.
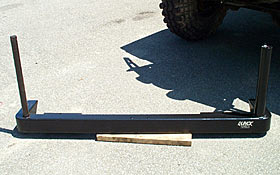
Step 2 It should be noted that neither Ben nor I got out a drill during this entire process. The Runck setup uses all existing holes in the frame for ease of installation for the consumer. It is important to leave all bolts loose until the bumper is fully installed to ease the installation of the product. If you do not, you may have trouble lining the bolt holes up correctly. The swing arm removes rather easily from the bumper by pulling up on the base of the arm. By doing this, you remove some of the weight and it makes it simpler to install just the bumper. Even after removing the swing arm, you will want a friend around to help you steady the bumper while you feed the bolts through the appropriate holes and get nuts started on them. Once the bumper was installed by bolting it onto the cross member, we then attached the top brackets and lower brackets to the bumper. Once all of the attachments were made, we tightened all of the nuts and bolts down. After the installation of the lower bumper, we installed the swing arm to the tire carrier. You can see in Figure 6 what the unit looks like without the swing arm installed to the bumper. Total time to complete this phase of the project was about 15 minutes, bringing the total install time to 30 minutes at this point. Step 3 Step 4 Although this won't occur on every Jeep, it is a common problem and is by no means a fault of Runck's. The bolts in the frame of the Jeep are often susceptible to mud and water getting trapped in the frame rail. This damaging mound of earth and moisture eats away at the nut in the frame, along with the bolt threaded into it. Over time, the obvious occurs. After speaking with Ben, he was already working on the issue. Ben is going to start including these bolts in the hardware list. This way, all you would have to do is possibly tap out the nutsert if it is rusted too badly. This is just another example of Runck going the extra mile to make it a snap to install their poduct. I included this step to show what problems may arise, and in doing so, have included the time it took me to complete this step. The total time for this procedure was 25 minutes, including the trip to the hardware store. Total time invested in the install - one hour. Step 5 With a simple hammer, I had the wheel studs pressed out of the 4.5" bolt circle holes, and pressed back into the 5.5" bolt circle holes. Runck pre-drills for both bolt patterns for those that have upgraded their axles. After getting the bolts pressed in, I mounted the 38" tire on the carrier. I would be lying if I didn't say that getting that 38" tire up to the tire carrier and mounted was the hardest part of the whole install. The total time to complete this step was 30 minutes (5 minutes on bolt pattern bolts, 10 minutes to mount the 38" tire, and 15 minutes to recover from the pain exerted on my back from hoisting the 38" tire on to the carrier by myself. Total time on the project - 1 hour, 30 minutes. This time figure doesn't include the time that I spent taking the old bumper off of the Jeep. Since it had failed and was in pieces when I took it off, the old bumper was a snap to remove. I didn't include this time because removal times of the old equipment will vary depending on what type of bumper you currently have on your Jeep, if any.
After-Thoughts I found the hardware list to be complete with everything that you need to finalize the install, short of the hand tools that you will need. I used an 11/16" socket, 5/8" socket, 10mm socket, 7/16" die, Phillips head screwdriver, and an air gun to complete the installation. Total installation time was about 90 minutes, excluding the extra 45 minutes I spent looking for tools. Overall, I really like this bumper. Besides being able to carry the 38" tire, which was my main concern, it has enhanced a weak part of my Jeep in both the strength area and the protection area. I would strongly urge those that are looking to add a heavy duty rear tire carrier from a reputable company to their ride to consider Runck Equipment.
Intro & Overview | All About It | Installation & Overview
|
|
Help spread the ROCKCRAWLER world!
|

