| |
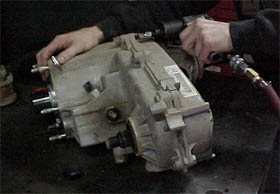 |
STEP
7
Go
ahead and unbolt the rear output bearing housing and
the two halves of the transfer case housing. You don't
have to worry about it falling apart. That silicone
they used from the factory is strong stuff. I don't
know why they bothered bolting it.
|
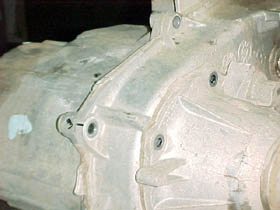 |
STEP
7 CONTINUED
Yet
another picture of the unbolted transfer case assembly
to further milk STEP 7. Take note that unbolting it
didn't do anything. See what I mean about that seal?
Kinda makes ya wonder why all 10 year old 231s are wet.
|
 |
STEP
7 CONTINUED STILL
Here
we go. The rear output housing is off and the rear cover
seperates with ease after some gentle prying. Keep in
mind that your transfer case housing is cast aluminum,
so don't beat the crap out of it if the seal doesn't
break right away. One of the most common problems with
231s are cracked housings, so be careful.
|
 |
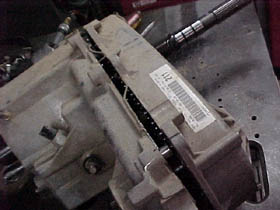
STEP
8
Here
is the detached rear cover of the 231 transfer case
assembly. On the right hole is a mechanical pump that
keeps the inside of the transfer case clean and lubricated.
Be careful with it because it is flimsy. You should
be able to leave it in place.
|
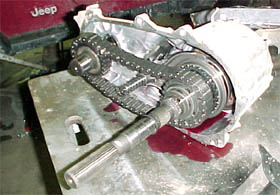 |
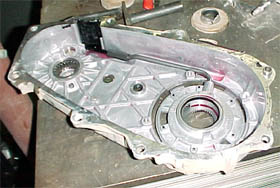
STEP
9
Here
is the inside of the dismantled transfer case. The 231
is a chain driven transfer case while many common transfer
cases like the Dana 300 and the Atlas are gear driven.
Check out the length of the mainshaft in this picture!
The object of this modification is to replace this long
mainshaft with a much shorter one.
|
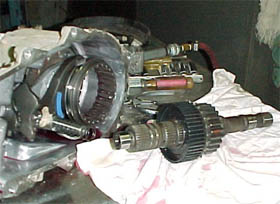 |
STEP
10
Go
ahead and remove the original mainshaft and chain. These
items should just slide out of the case with ease. Put
them someplace safe and keep the chain clean until you
are ready to reinstall. The "synchro-hub assembly"
(the large gears) will still be on the mainshaft at
this point.
|
| The
Syncro-Hub Assembly is removed from the stock mainshaft
and reinstalled on the short mainshaft on PAGE
5. |
|
PAGE
INTRO 1
2 3
4 5 6
7 8
BACK
TO TECH REPORTS MAIN PAGE
|