| |
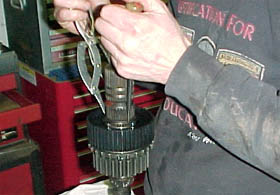 |
STEP
11
There
will be a snap-ring holding the synchro-hub assembly
in place on the mainshaft. Once again, use your snap-ring
pliers to remove it. This snap-ring will put up a good
fight, so be patient. Finally, a use for your third
hand.
|
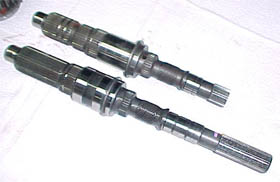 |
STEP
12
Here
are both shafts side-by-side. The short one that Tom
Wood provides with his kit is just as beefy as the stock
one that was removed from the 231J transfer case, so
there are no inferior parts involved.
|
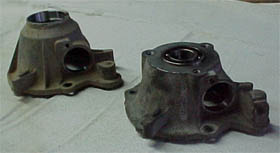 |
STEP
13
While
we're doing side-by-side comparisons, here are the 231J
rear output bearing housing on the left and the regular
231 rear output bearing housing on the right. The above
short shaft will protrude from the 231 housing which
is short enough to facilitate a seal and an output flange.
|
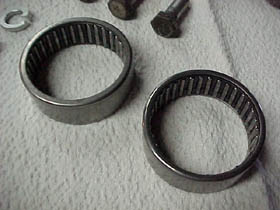 |
STEP
14
This
is a picture of the roller bearings that are to be pressed
into the synchro-hub assembly below.
|
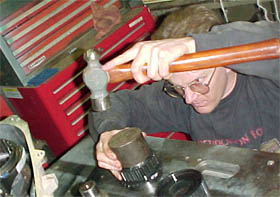 |
STEP
15
Eric
is carefully tapping the bearings into the synchro hub
assembly using a hammer and a large cylinder. You want
to be careful to keep the bearings level over the mouth
of the synchro-hub assembly. You will only get one shot
at this!
|
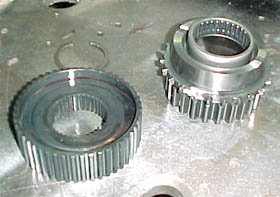 |
STEP
15 CONTINUED
This
is a picture of the dissassembled synchro-hub. The loose
roller bearing is resting in the center of the main
gear. You want to put one bearing in either side of
this gear. It will be a snug fit.
|
| On
PAGE 6, we're going to clean up
the transfer case, reinstall the chain and the modified
short shaft, apply silicone gasket sealer, and start putting
it back together! |
|
PAGE
INTRO 1
2 3
4 5 6
7 8
BACK
TO TECH REPORTS MAIN PAGE
|