This site earn a commission from merchant affiliate
links, including eBay, Amazon, Skimlinks, and others.
Here is my latest build on my original 2 seat Goat Built Ibex based buggy. I built the rig in 2013/2014 and have wheeled it 3 years but with the addition of a little on decided to add a back seat. Here is the rig from before:
Cut the rig in half and redo the tubing from behind the B pillar. Still leaving the suspension and 110" wheelbase. The new rear bumper tube is 1" back farther and 1.5" lower than the previous setup.
Started with some basic tube to get the overall shape. This is a 36" PRP seat that is 3" shorter on the butt cushion for extra leg room and has the mud option that has a couple inches of mesh at the base of the seat pad for water and dirt to fall through instead of pooling up.
Changed mind on frame rails and put a small bent to make under the fuel tank flat. Fuel tank is a 18 gal Goat Built tank. Switched to it from my Jaz tank for shorter front to back dimension to allow the rear seat to sit back as far as possible.
To mount the seat lower for maximu head room I made the rear mounts go through the frame tube
Built the floor and under seat panels out of some old road signs. Stripping the sticker part off sucks on them but free aluminium. I mounted the foot panel flush on top of the existing chassis tube to match up with the original interior but mounted it low on the crossmember tube in fron t of seat to get the foot bed flatter and as low as possible. Also mounted the transmission cooler under the seat. In the original version I had it under the gas tank in the similar location. I like that since it is out of the way and you don't hear the fan as much. Only time I have had transmission temperature issues was during a couple races but I really don't intend to race anymore.
Transmission cooler at ride height and at full bump
Also put a notch in the crossmember behind the seat that is directly above the axle. Plumbing and wiring should clear without but with this notch give a bunch more room to route fuel and wiring. Seat frame clears crossmember by 1/4" (the seat fabric rests on crossmember lightly) and the axle clears crossmember by 1/4" at full bump.
For the back seat shoulder harnesses I used some threaded weld washers. Thought they looked cleaner than a tab on the shock tower crossmember.
Test fit a tire to check clearances for side interior panels. Was originally thinking of one big panel that would have 4 bends but thinking of adding a couple brace tubes that I can incorporate my interior into instead now.
Thats about where it is now. Got the roof made and waiting for vinyl to wrap it. Started plumbing tranny cooler and fuel back in to weld those mounts in. Put a little paint on it last weekend since I use my shop at work but pull it out everyday. Try to prevent rust issues on the majority of the tube that is all done now.
Spotter Required
Media Partner
eternal noobie
Staff member
Looking good!
Have to laugh at the road sign panels....PO of my rig did the same, but left the colors/text on them...my hood and roof skin are a bit obnoxious from the underside
")
How have you liked the ORI's? Long term, I'm linking the rear of my FToy and I've heard a ton of positives on them over the years. Seems like a great setup (just not cheap)
rear interior panels built. Trying to decide if I want to sneak a panel in behind the seat or not
eternal noobie
Staff member
What drops into the opening behind that rear seat? IMO, I wouldn't bother with another panel, it will simply be a hard spot to get to for cleanup
What spacing did you use for your panel tabs? Those are on my short-list for my FToy....looks to be about 12" apart?
The dirty aspect is the negative for sure. Only real reason for it would be a firewall between seat and tank.
What spacing did you use for your panel tabs? Those are on my short-list for my FToy....looks to be about 12" apart?
On the rear panel about 7" across the top, basically put a tab on each end then made the other 2 equal distances. On the main body skin I think they are about 8" spacing. Probably overkill but I wanted equal spacing and that's what fit without having a mounting tab land on a tube or something and getting the symmetry off. I also figure the more mounting tabs the less chance of vibration rattles.
I was originally going to put my compressor between the seat and fuel tank but the viair didn't fit so sold it and got an ARB compressor and it could fit but is small enough it fits nice behind the oil accumulator in the belly so now nothing is going between seat and fuel tank.
She runs and moves again. Sitting a little tall here but only a few gallons of fuel and no gear in it yet so will address that shortly. Hope to test it out this weekend or next if it quits snowing sometime. Moved the cutting brake in front of t-case shifters to give more rear seat foot room between the front seats and it feels better there too. Working on a new hood still now. Also added turn signals and waiting for a high/low beam headlight to show still to make a little more road worthy along with some 41.5 PBR radials.
eternal noobie
Staff member
Looking good!
I'm toying with cutting brakes in the future....whose setup did you go with?
It is a CNC angled handle 3/4 bore cutting brake. Used to have it mounted between the seats so you reached down and pulled handle upward.
Note: I did have to use soft lines to the cutting brake in this orientation so I can unbolt the cutting brake and lay it flat so I can bleed the rear brakes
eternal noobie
Staff member
thanks...been looking at options for the future....have heard of that brand at least
")
My old 700r ran the Art Carr shifter too, but with a standard manual valve body....wish I had done reverse, but cutting out the gates worked good enough
The reverse valve body and gate shifter is nice but if I were to do it again I would do a basic tranny with maybe a shift kit or something at most and that new shifter from Moab 4x4 Outpost. We are going to EJS this year and thinking I might see if they have some of those shifters and just pick one up for the future.
eternal noobie
Staff member
I'll check the rig out at EJS then - we'll be there for the week+...likely just bringing the 80 out tho, leave the FToy at home for that trip
Will be great to meet you. We plan on being there all week as well.
Buddy helped me build the new hood. It has more visibility through the side of the chassis and only weighs 7lbs vs 35 on the old hood. Had to be about an inch higher than the chassis tubes as the engines sticks up through.
The rig worked good in moab. Initially had the ride height a little low and was hitting belly hard a lot but adjusted that easy enough one evening.
A little snow wheeling this winter. Snow was super dry, sugary, and deep. Had to train up to make progress for quite a ways.
eternal noobie
Staff member
Looks like a ton of fun
Have the valve cores pulled on those tires??
We've had a VERY dry winter here....usually "visit" the snow in the mountains for some snow wheeling, but it's slim pickings....not that wheeling yesterday in the 50's was bad
Played in some crusted sugary snow this weekend. Here is my GoPro footage of a stretch. Horse Power was working pretty good and tires at 2 psi.
eternal noobie
Staff member
nice and powdery...love it!!
The rig worked good in moab. Initially had the ride height a little low and was hitting belly hard a lot but adjusted that easy enough one evening.
Nice Remodel!!
Had it out snow wheeling again back in April
Then went out to play in the rocks a few weeks ago. Kept hearing a rythmic clicking noise on the way to the rocks and after doing this one V notch the buddy I was with (Whose Rockwell S10 is for sale, BTW) and I had to head in and the clicking was worse. Could see the damaged gears through my inspection/fill hole. After discussion with few guys I decided to have the new gearset cryo treated and am also going to switch to amsoil severe gear 190 oil. The gears showed lots of wear so hoping those help out. Don't think it was a shock load break, but more of a wear/fatigue leading to the failure.
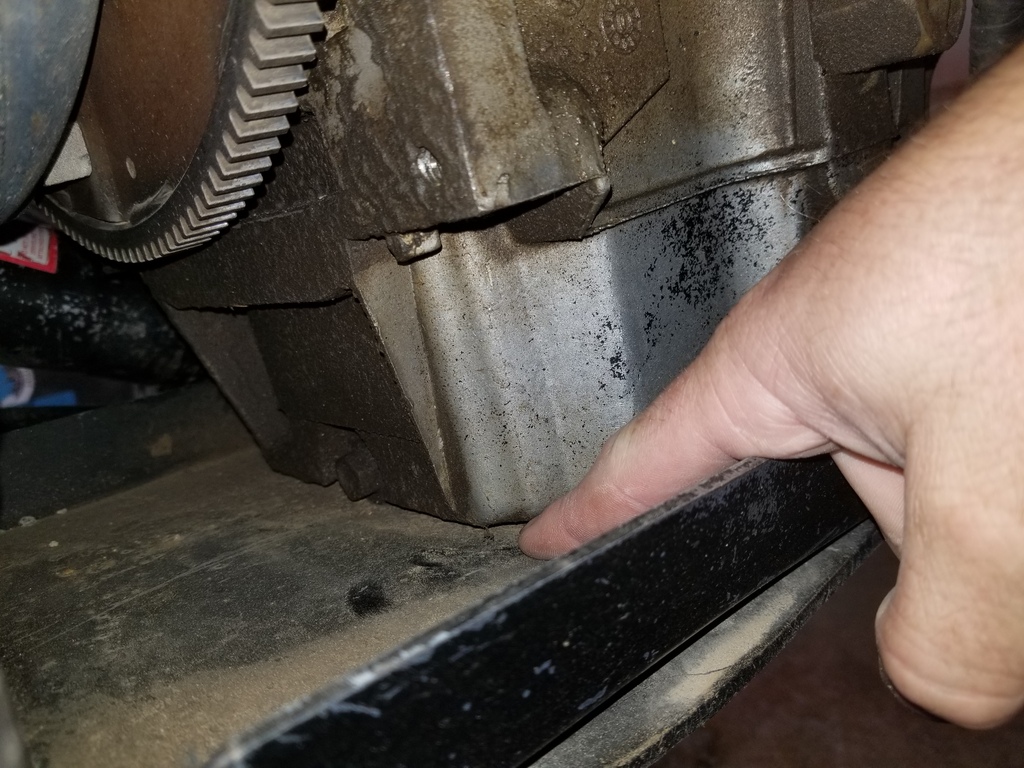
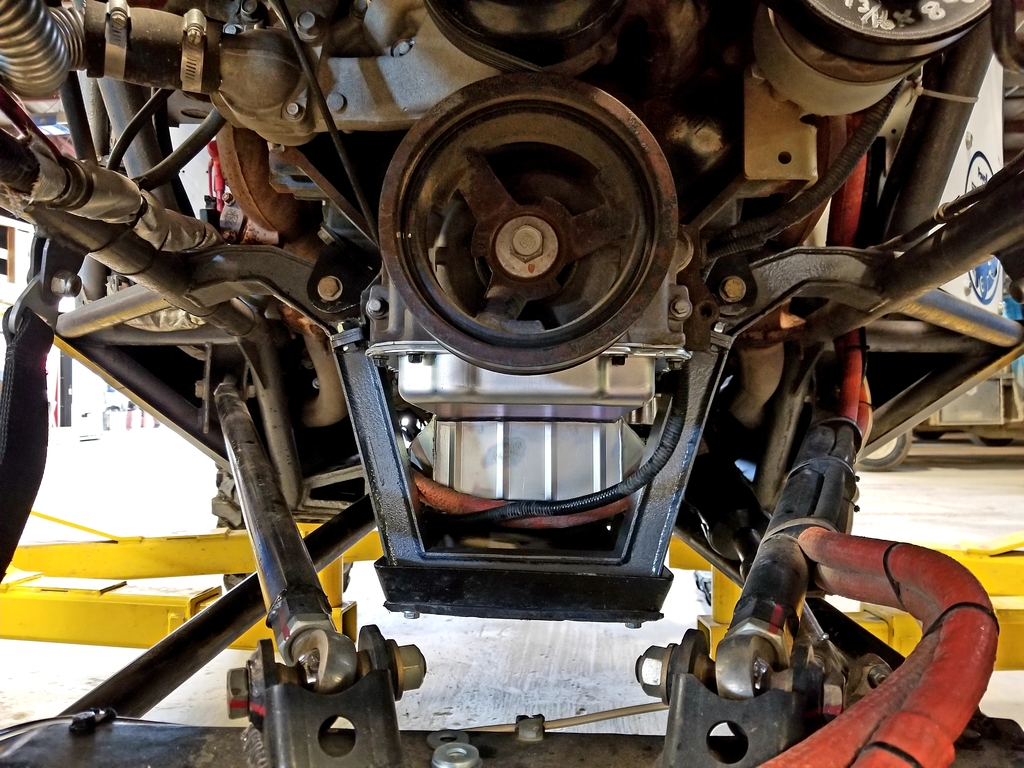
While waiting for the front ring and pinion to get cryo'd by Performance Cryogenics so went ahead and swapped the oil pan. The chassis is designed to fit the factory truck oil pan but it barely clears the skid. I had shimmed the skid down 1/4" to help with some breathing room but has always been a concern. After seeing a few recent guys kill oil pans I decided it is much easier to change now then deal with a broken pan later.
Changing the pan will also allow me to lower the drivetrain in preperation to re-tube the front half this winter for better visibility. I now have a touch over 2" clearance at the oil pan, 2" at the trans pan, and 1.625" at the converter/crossmember. Thinking of lowering it about 1" so keep a little breathing room.
The next step is to try a different exhaust manifold/header to gain clearance to the engine crossmember or re-build the crossmember. Will tackle that next.
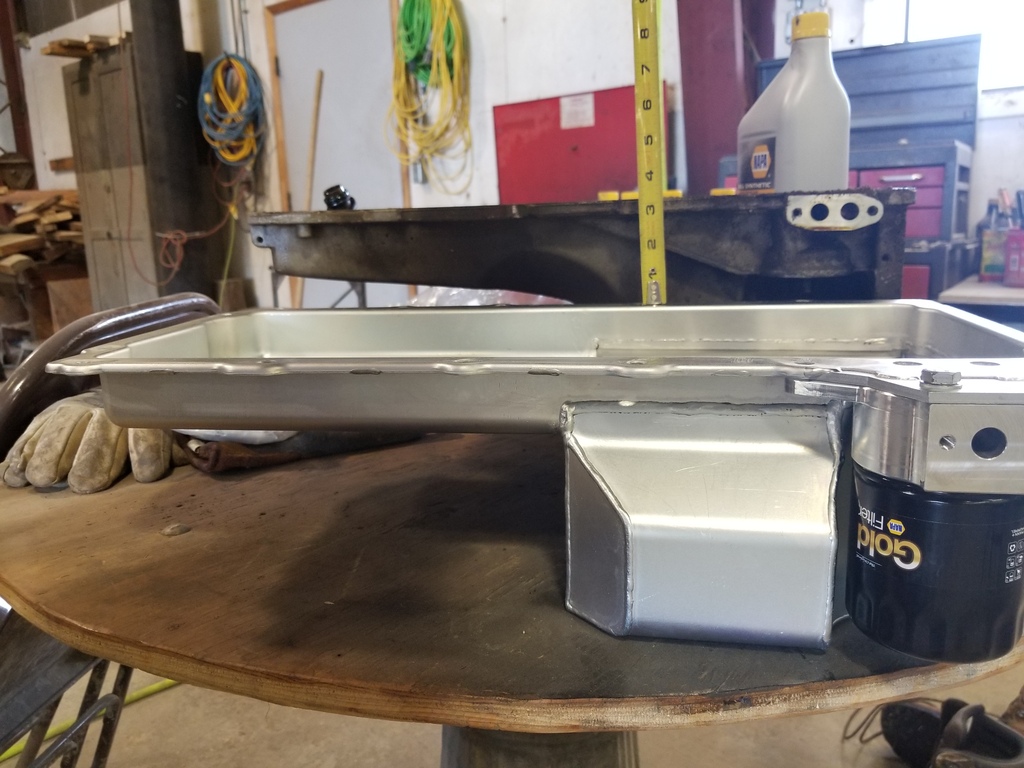
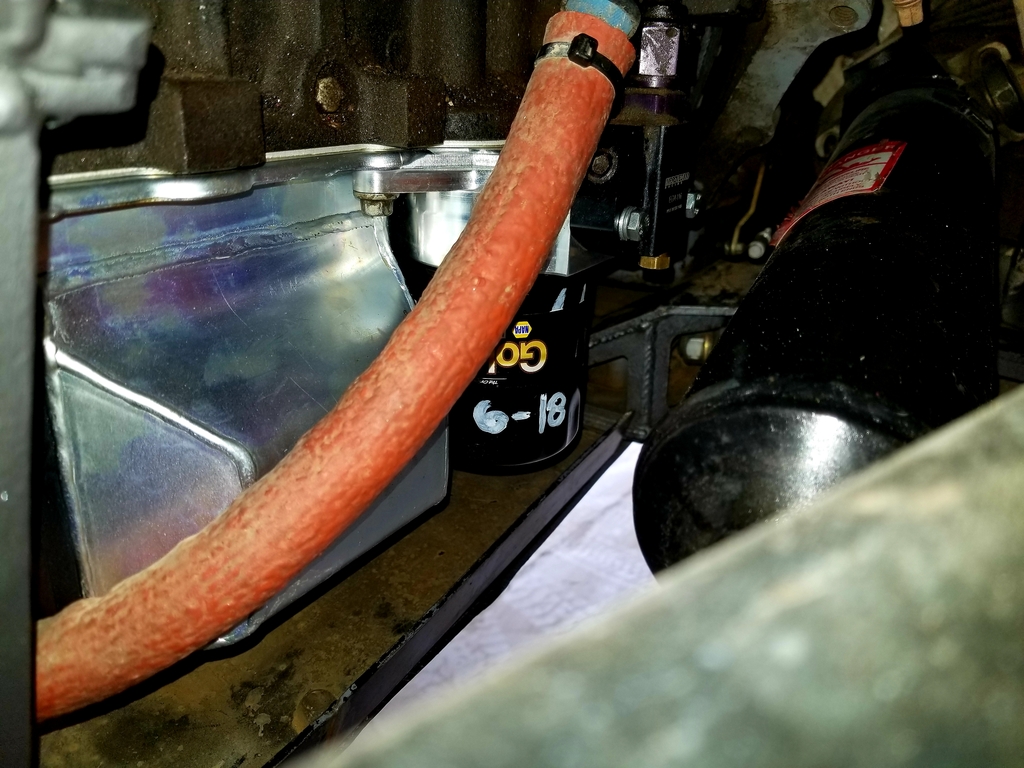
The new oil pan is a champ pan made by JR Manufacturing. Same pan that Tilden and Autokraft rebadge. With ebay deals recently I am into the pan $376 shipped. Here are the P/Ns if anyone is interested:
Pan Champ LS1000
Pickup tube Champ 750LS1
Oil Filter adapter Champ LS1001
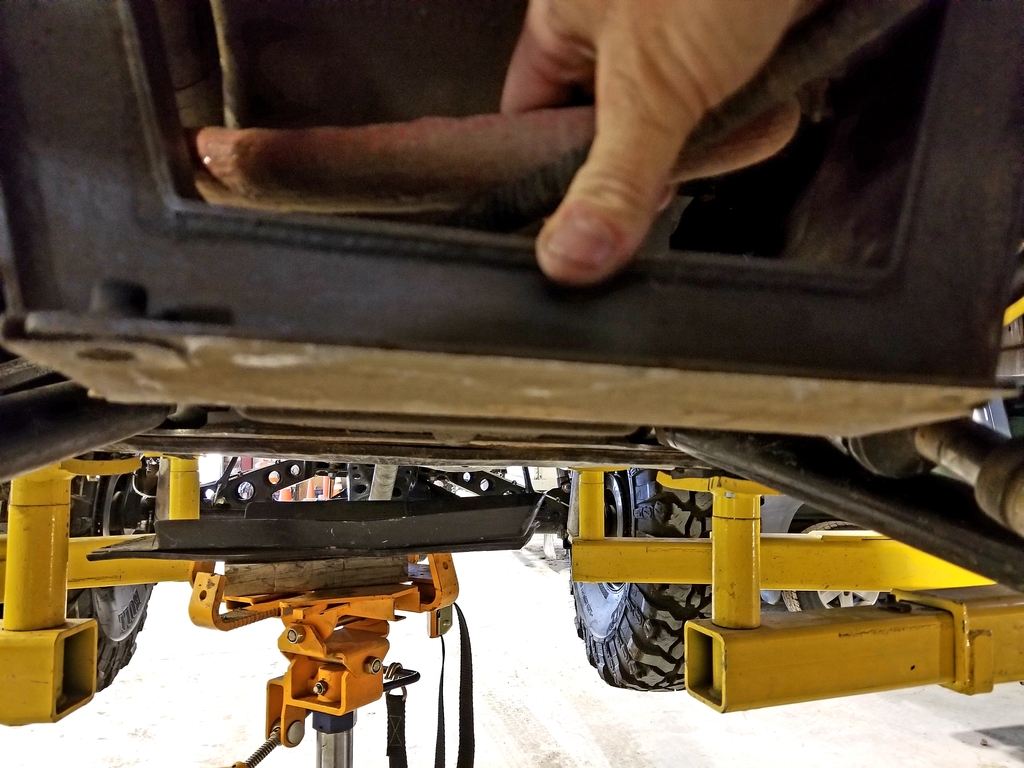
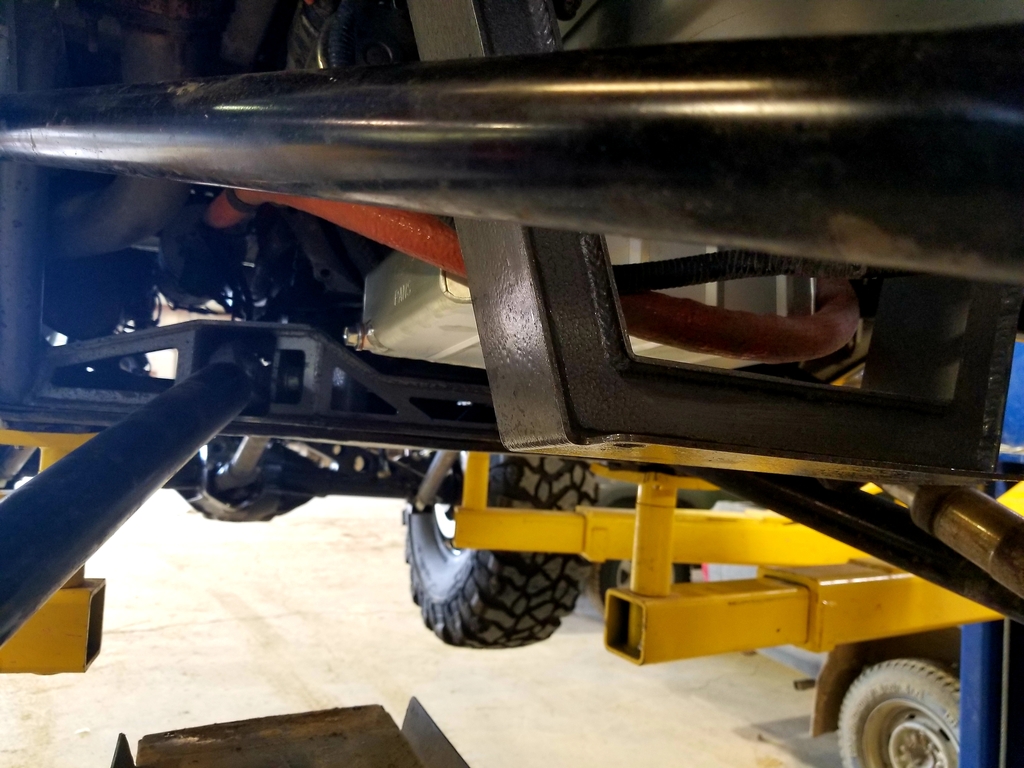
Here are shots with the new oil pan. One concern was this pan is wider and driveshaft to oil accumulator adapter clearance but the picture at flex shows plenty of room still. The oil pan won't drop out of the engine crossmember so I cut it out and cut 1/2" out of it and made some flanges to make the crossmember removable. Didn't have my rivnut setter with me so will made a hose retainer bracket later to tidy up that hose and wire.
eternal noobie
Staff member
Good to know Performance Cryo is still around....I may get my next rear gearset done.
Love the snow wheelin! One of the things I miss here....well....kinda...lol